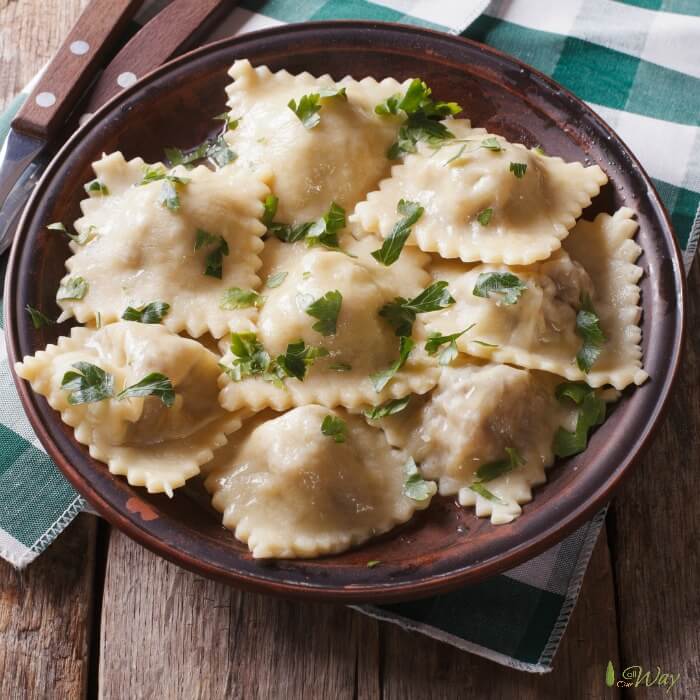
Making homemade Italian ravioli with meat and cheese filling may seem like a troublesome task because of the multiple steps, but the steps aren't difficult and the process can be lots of fun. When we make the little meat and cheese filled pillows, we plan on making a double and even a triple batch. This is Italian cuisine at its finest.
Jump to:
Make extra for freezing
They freeze beautifully and it's wonderful having these delicious bites of pasta on hand when we're too busy to make something special for dinner, or even if the unexpected company is coming.
All it takes is grabbing some out of the freezer, tossing them in boiling salted water for a bit,
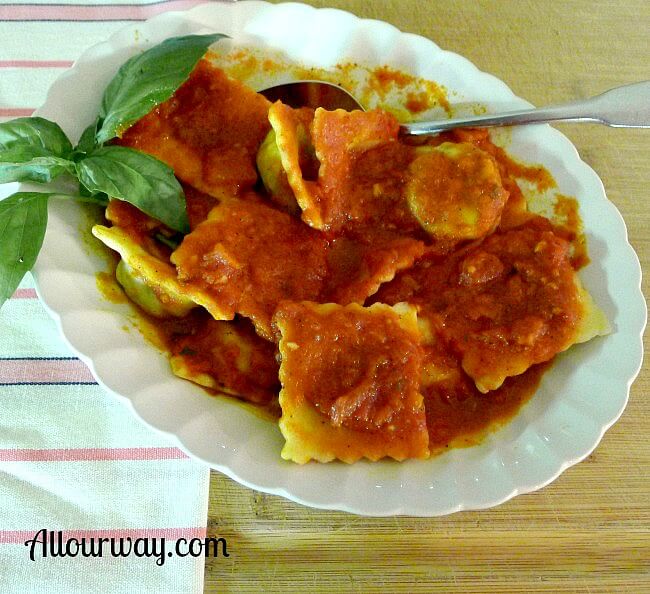
and then covering them with a delicious sauce.
All you need for an all around delicious meal is a tossed salad with Italian dressing and some homemade crusty Ciabatta bread. This is all it takes to complete the perfect Italian ravioli meal.
How to make Italian Ravioli
Italian ravioli is a two recipe process
- the filling
- and the pasta
With steps combining the two to make the finished pasta pillows.
Our first step is to gather the ingredients and prepare to make the filling.
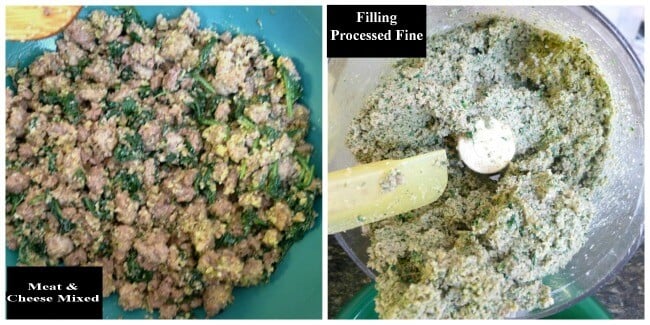
We cook the meat, and once it's cooled, we put the filling in the food processor. Pulse the processor several times until the texture of the filling is fine.
The filling goes back into the bowl and then off to the fridge to firm up. The filling is so much easier to work with when it's cold.
The second step is to make the pasta for the Italian ravioli in our food processor.
We use our processor a lot! It makes doing a lot of little jobs much faster.
The dough comes together in a matter of minutes. Once we zipped, zipped the dough in the processor we let it rest covered on the counter.
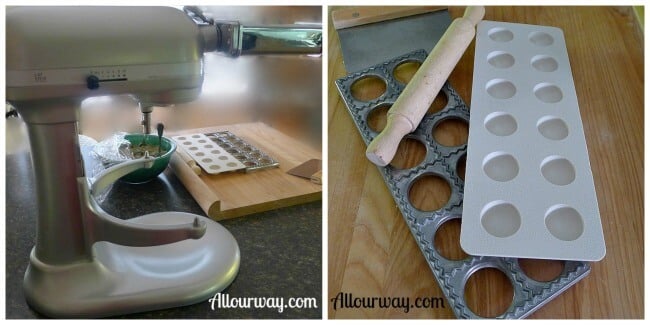
By the time the pasta finishes resting on the counter, the filling cooled. The pasta now goes ready through the roller.
Both the pasta roller attachment and the ravioli maker are gifts from our kids -- do you think they were hinting? 🙂
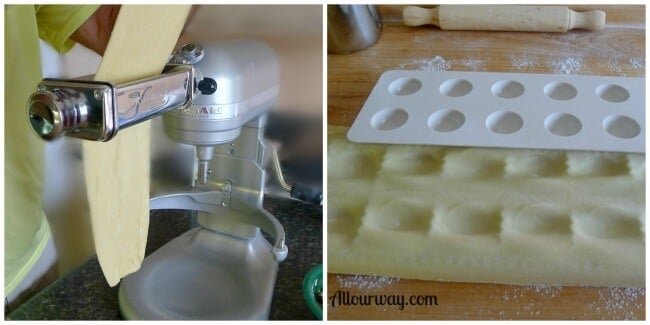
In the third step we pass the dough through the widest setting 4 times, folding the dough each time into thirds.
The dough becomes very pliable and durable as we continue to pass the dough through the thinner settings.
We continue until we reach the number 6 setting.
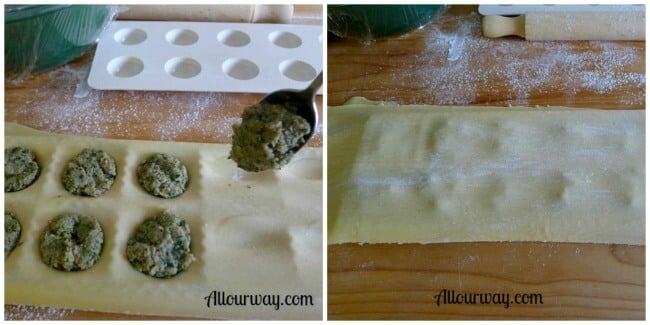
Putting Ravioli Together
We use about one teaspoon of filling for each little pocket. The ravioli form is so easy to use, it makes ravioli production extremely easy.
You do have to be careful not to overfill, you want the edges to seal. If there is too much filling, the ravioli may pop open when you put them in simmering water.
We lightly mist the bottom pasta layer with water before we add the top layer of pasta. This insures that the pasta will seal.
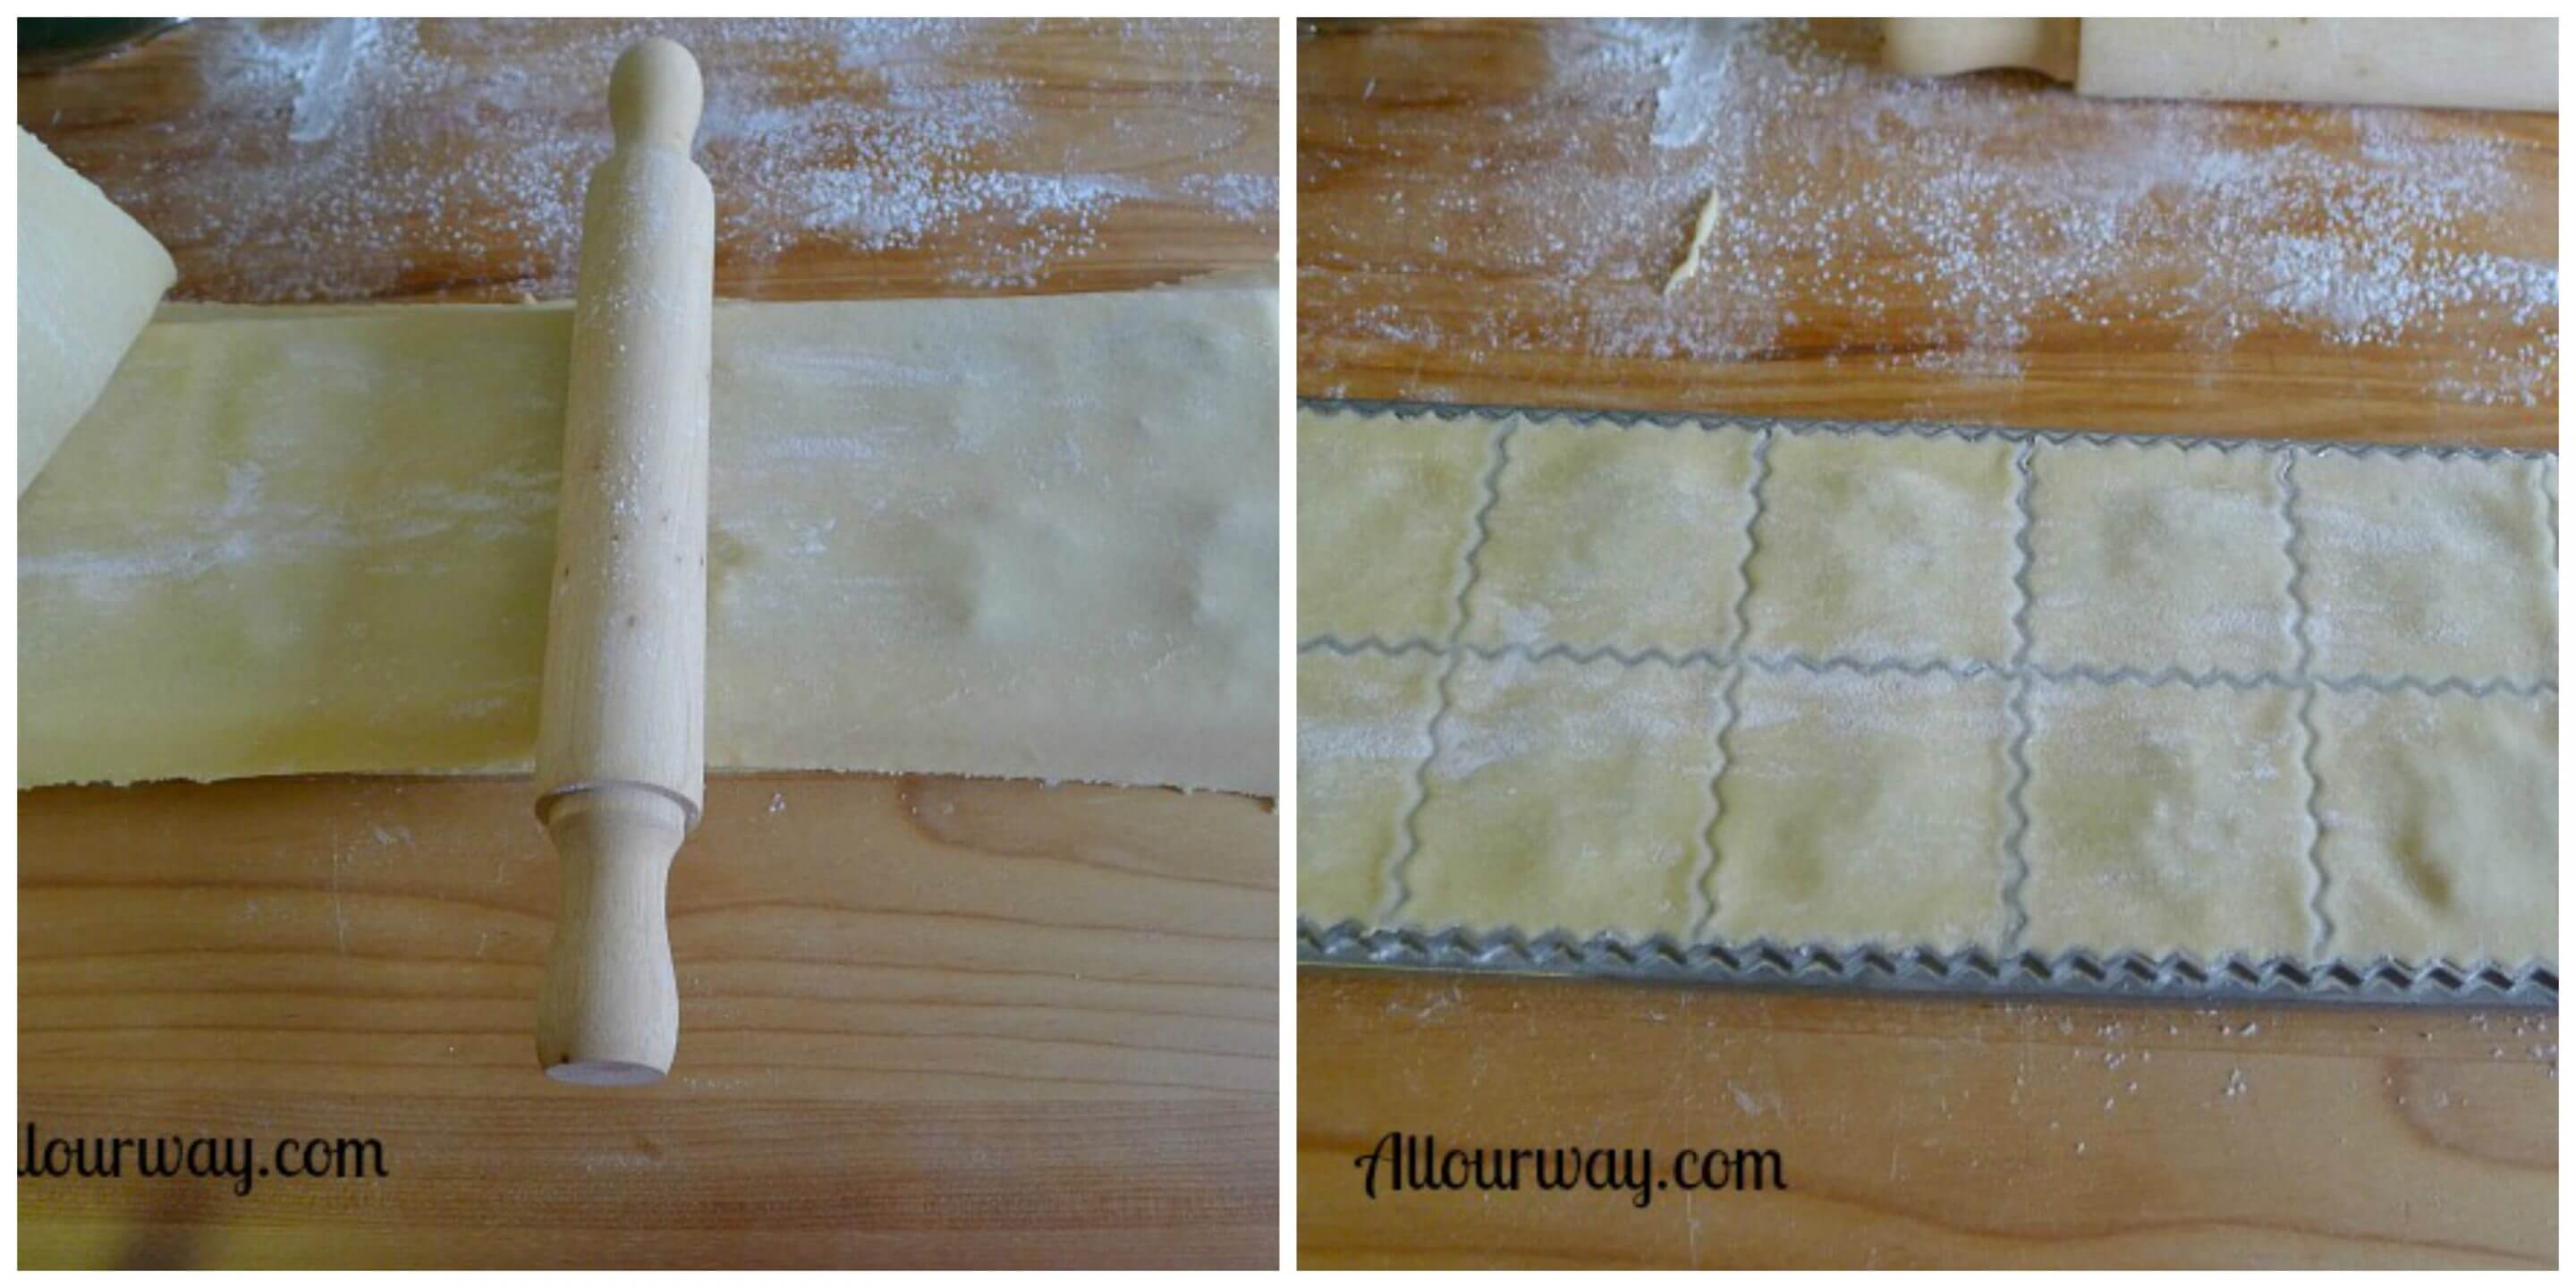
When we're ready to seal the dough we start to press the rolling pin from the center to one end and then start from the center and go to the other end. The dough stretches, this way the dough stretches evenly.
We go over the top several times to make sure that the edges are sealed.
The extra pieces of dough that we cut off the edges we reuse by running them through the pasta roller. The dough is very forgiving and easy to work with.

The fourth step is to transfer the plump meat and cheese filled pasta to a parchment lined baking sheet.
As soon as we fill one baking sheet, we put it in the freezer and start on another sheet. Once the ravioli freeze, we seal them in freezer bags and put the bags in freezer containers.
Preparing Italian Ravioli
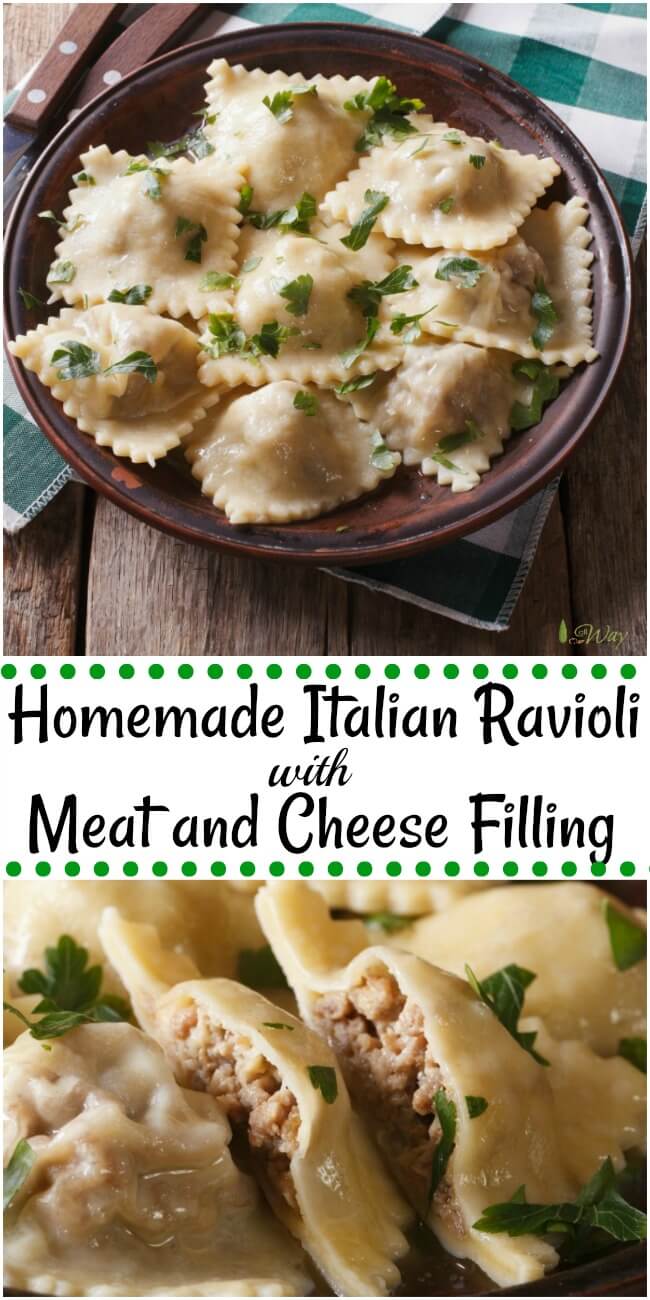
Finally, we're at the best part -- cooking them.
We fill a pan with water, let the water come to a boil, salt the water, and then gently slide the Italian ravioli into the water. Keep the water at a gentle simmer; the ravioli will be less apt to break open.
We let the ravioli cook for about 3 - 4 minutes. If the ravioli are frozen, cook a minute more. We use our spider to fish them out of the water and then we add whatever sauce sounds good.
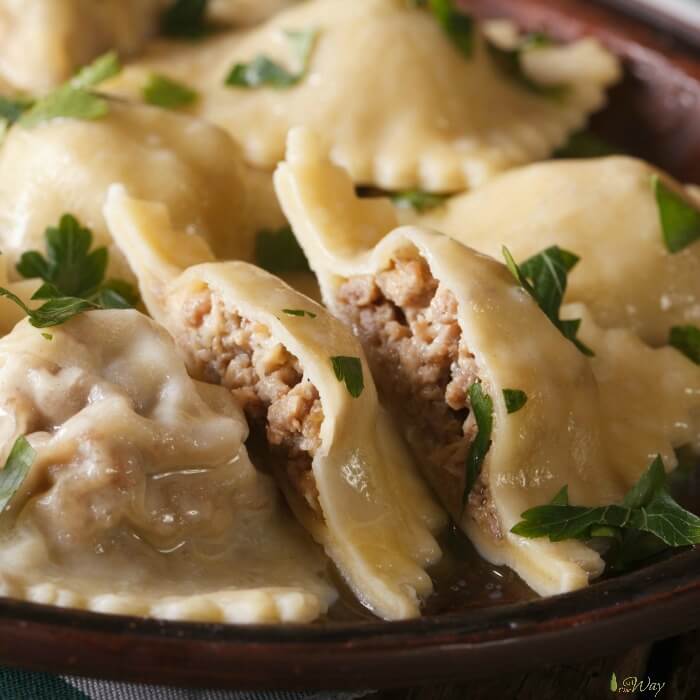
These little pockets of flavor are so tasty and versatile. You can dress them up with any sauce, even an Alfredo if you like.
We've even deep fried ravioli and had them as an appetizer. Believe me, they are so good I bet you can't stop at one!
You may enjoy these additional ravioli fillings
Rustic Italian Spinach Ricotta
Lamb Ravioli With Brown Butter Sauce
We are planning on making a whole collection of ravioli recipes - keep an eye out!
Tutti a tavola è pronto!
Un caro saluto e alla prossima
YOU MAY NEED . . . The following are affiliate links. As An Amazon Associate I earn from qualifying purchases.
What’s new? check out my All Our Way Store on Amazon. We’ll be adding more items we love and use or wish we had to make cooking fun and easy.
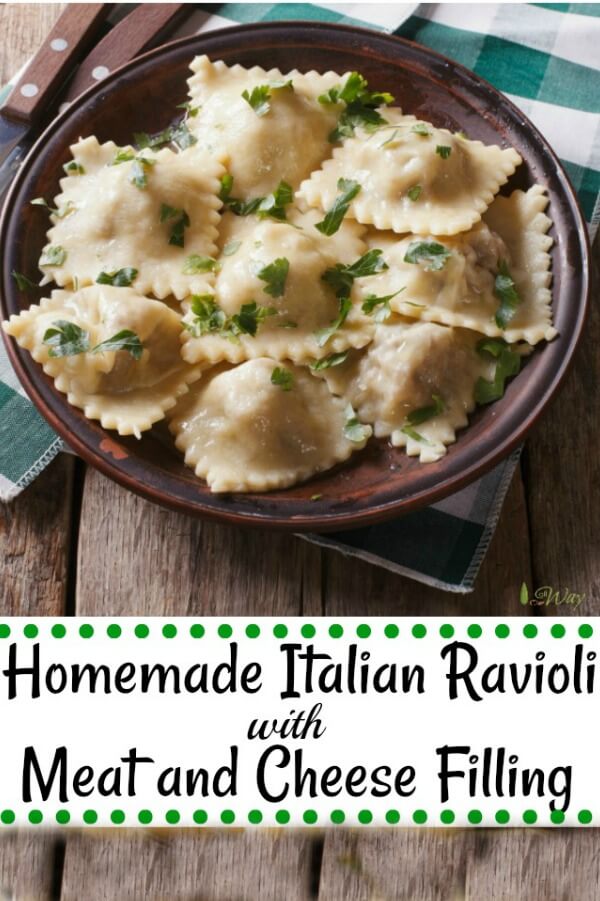
Homemade Italian Ravioli With Meat Cheese Filling
Homemade pasta filled with a spicy meat and cheese filling is just what you find at local village restaurants in Italy. You can bring that experience home by making the pasta pockets yourself. They're easy to make and delicious to eat. You'll never buy ready made again.
Next time try our triple mushroom ravioli filling. Truly delicious! And you must try our simple Spinach Ricotta Ravioli. Everyone will think you have an Italian nonna working in your kitchen.
If you like this recipe, please consider giving it a 5-star rating.
📖 Recipe
Homemade Italian Ravioli with Meat & Cheese Filling
Video
Ingredients
MEAT CHEESE RAVIOLI FILLING
- 2 eggs beaten
- 2 Tbs parsley chopped
- 12 oz beef chuck ground
- 12 oz pork sausage country style
- 16 oz ricotta cheese
- 1 cup parmesan cheese grated
- 1 Tbs olive oil extra virgin
- 1 teaspoon kosher salt
- 1 cup spinach leaves baby spinach chopped.
PASTA DOUGH
- 14 oz. all-purpose flour 3 ⅛ cups
- 4 eggs large
- 1 Tbs olive oil extra virgin
- 1 teaspoon Kosher salt
Instructions
FOR THE MEAT RAVIOLI FILLING
- Fry the meat in olive oil until well browned. Drain the meat on paper towels
- When the meat cools a little put it into a large bowl and mix in the chopped spinach. chopped parsley, beaten eggs and the rest of the ingredients, add salt and pepper to taste.
- Put the filling into the food processor bowl and pulse several times until the mixture is fine.
- Return the filling to the mixing bowl and refrigerate. (The filling is easier to work with when refrigerated.) The filling will give you enough for a double batch -- making about 90 - 100+ ravioli. The filling can be frozen.
PASTA DOUGH
THE FOOD PROCESSOR METHOD
- Using the metal blade pulse the flour and salt together.
- Lightly stir the eggs and olive oil in a measuring cup.
- With the processor running, add the egg/oil mixture all at once through the feed tube until a ball is formed then pulse several times. The dough should be slightly sticky to the touch and should spring back when you press it.
- Form the dough into a smooth ball and place on a dough board or tabletop and cover with a bowl for 30 minutes.
- After 30 minutes you can make the dough into your preferred shape. This is a single batch --you'll need to double the dough to use up all of the filling.
MANUAL METHOD
- Sift flour and salt into a mixing bowl.
- Gradually add eggs and oil to flour, mixing with a spoon. As the mixture becomes lumpy, begin to press together and knead with your hands. If mixture seems too dry and grainy, add one tablespoon of water at a time until the mixture holds together into a ball.
- Remove dough from the mixing bowl and begin to knead dough for 2 minutes on a lightly floured dough board or table top.
- Cover the dough with a bowl and let the dough rest for 30 minutes. Allowing the dough to rest will improve the texture of the dough.
TO COOK RAVIOLI:
- Bring a large pot of water to a boil. Salt the water. You want your water as salty as the sea.
- Add the ravioli in batches. About 10- 12 at a time. Don't overcrowd. Bring the water back to a gentle simmer and cook for about 3-4 minutes. If the ravioli is frozen, cook for an additional minute.
- Remove with a slotted spoon or spider to a serving dish. Continue cooking the rest of the ravioli. Serve with your favorite sauce or just with extra-virgin olive oil, butter, sea salt, and freshly ground black pepper. Sprinkle with fresh herbs.
Notes
Nutrition
Sign up for the emails and never miss another recipe!!
We'll never share your email or send you spam. PromiseNote: Recipes and content from All Our Way ©2014- 2018 are copyright protected. Please do not use content or recipe without prior written permission. If you want to share the information please link to this post. Thank you.


Zac Ford
Yumm!
Joseph
Boungiorno Y'all from Texas ! I guess I was guided to read your recipe today recently been looking at moms hand made by dad ravioli maker. from the 1940s. Im 80 now cook 3 plus meals a day and love my Garden , Fishing in da lake and witnessing for Our Lord . I will get picking some chard and spinach its almost ready , use loccatela cheese and make some with chard an some with spinach and chili flakes for a kick and maybe some with fennel seed , mouth watering while Im typing this , do have a garden ?? love my chard I grow 5 diff kinds. one is Bareese , seeds from Italy great leaf use for sandwich as lettuce and the big white thicker stem green leaf one love those stems cut half inch cooked in olive oil n Garlic, when aldenti ad wet wash leaf cover an seam from wet leaf cooks all toss in pan with tongs ill all combined yummy healthy side. ,ya can add some chili flakes for heat ,ground pepper salt. enjoy Chow
Sandy James
Made them Christmas Eve with the family for Christmas dinner. Grandchildren had a ball making them. Followed the recipe exactly, easy to follow and make. They came out perfect and delicious! Had enough left over to freeze for 2 more dinners. Thank you for sharing!!
Marisa Franca
Hello Sandy! Thank you for your sweet comment. I'm so happy you and the family loved the recipe. And yes!! It is a fun project to make and then it's even better to enjoy. Have a very Happy New Year -- and more ravioli to come!!
Norah Reno
Hello! I haven’t yet made this yet but plan to for Mother’s Day. The recipe says it serves 15 people. My family is made up of 5 people and we eat a LOT. I was curious, how many pieces of pasta will a serving will make?
Marisa Franca
Hello Norah! That filling will make about 100 ravioli. Now, typically you figure 5-6 ravioli per person. But hey! We've got some big eaters in the family who'll go back for seconds. It doesn't hurt to have extra for them. Hope you have a wonderful Mother's Day!! xoxo
Carla
Marisa, What sauce is shown in the picture? I’m wondering if you would suggest other sauces other than a red sauce.
Grazie mille!
Marisa Franca
Ciao Carla! In that photo, I'm using a light wine, butter, garlic, and Parmesan sauce. I did a light browning of the butter before I added the garlic, wine, and Parmesan. We don't always use a red sauce or an Alfredo sauce. Happy cooking!
Carla
Thank you! I will try your sauce!
And thank you for responding so quickly.
Love to follow you!
Rebecca
Haven’t made this yet, but planning to tomorrow! What are the measurements for this sauce?
Marisa Franca
Hi Rebecca! I'm really sorry, but I'm uncertain what sauce you're referring to. Can you be more specific, and I may be able to answer you? When making our ravioli, we add the sauce as we prefer. We like it saucy since we like to sop it up with homemade bread. Let me know if I can be of any additional help.
Rebecca
Hi Marisa, I meant the butter wine sauce in the photo ☺️ also, how long can the filling be stored in the freezer for?
Rebecca
Hi Marisa, I meant the one in the photo ☺️ also, how long can the filling be stored in the freezer for?
Maria Burks
Turned out full of flavor!! Only changes were that I added chopped onions and fresh garlic to the meat while cooking. I also fried them after and they turned out delicious!!
Marisa Franca
Thank you for commenting, Maria! I'm so glad you enjoyed the ravioli -- YUM! I bet they were delicious fired. xoxo
Jessica
Made these for our last christmas meal. The filling was easy to prepare and was smooth to spread. I absolutely love it. The only changes we made were that we added onion and garlic. On Christmas day everyone enjoyed them however my son said they
lacked flavor. Next time I would add more salt. Thank you for sharing this recipe.
Marisa Franca
Ciao, Jessica! I'm so glad you enjoyed the recipe. Thank you so much for taking the time to comment. Wishing you and your family a very Happy 2022.
Linda
I love fresh ravioli and this recipe is a keeper! My family really enjoys the meat and cheese filling and how they all blend together
Marilyn Legato
We made this for this past Christmas instead of our usual recipe. It was delicious. Everyone loved it. The only change I would make is of my own doing. I would use a lightr gravy than I made which has ground beef and pork in it. I really appreciate your Italian phrases as it helps me to remember my Italian from years ago.
Marisa Franca
Ciao, Marilyn! Sei molto gentile, grazie! I'm glad you liked the recipe and the Italian. Alla prossima! Marisa
Lindsey
I made this a few months ago and it was delicious!!
This time I need to make them a day in advance and my freezer is awful. Do you think it would be ok to store them uncooked in the fridge for a night?
Marisa Franca
Hi, Lindsey! Yes. It would be fine to keep them in the fridge for a night! I'm so glad you like them -- hope you are doing well. xoxo
Scott
I'm getting ready to make this recipe and a bit confused as to 2 different measurements for the flour. 14oz or 3 1/8 cups?
Marisa Franca
Hi Scott!!! Sorry for the confusion. Some people prefer weight measurements so I give both. Either use the cups OR the weight. Let me know how it goes!!
Aimee Schulke
I am confused as well. When I saw 14 oz. all-purpose flour 3 ⅛ cups I wasn’t sure what to do. 8oz is a cup…? Please explain. Looking forward to making this!
Marisa Franca
Hi Aimee! A cup of liquid is measured as ounces what your referring to. If you'd take a cup of marshmallows and weigh them, they would weigh differently than a cup of chocolate chips. We measure with a kitchen scale. So if you'd measure the 14 ounces by scale, you'd end up with approximately 3 1/8 cups of all-purpose flour. Measuring by scale is more accurate. I hope this helps. If you have any other questions I'd be happy to answer them for you.
Rose
I haven't made this yet but will be soon. Can the ravioli be frozen?
Marisa Franca
Hello, Rose! Yes, they can be frozen. They freeze beautifully so you can have ravioli at a moments notice. Hope you have a wonderful holiday season.
Rowena K
I made these with some adjustments for dietary needs. My daughter can’t have pork or ricotta cheese so I used only extra lean ground beef and left out the ricotta. I added about 1/2 tsp of onion powder. They are wonderful! I will definitely make them again.
Marisa Franca
Hello Rowena! Thank you so much for taking the time to comment. I'm so glad you liked the ravioli. I'm planning on making more types in the next month -- some without meat such as butternut squash and beet with goat cheese. Have a wonderful holiday season. xoxo
Denise
Fantastic! I’ve never made ravioli before. Your instructions made it easy and the recipe is delicious. I can’t wait to try your other recipes!
Nicola
Cara Signora
ma quando si arriva al pane artigianale? Sour dough possibilmente...............Grazie...
Marisa Franca
Caro Nicola! Presto presto! Anche la ricetta del pane siciliano. Hai altre ricette che vorresti vedere? Qual è la tua ricetta preferita? A dopo!
A
Any suggestions for a family who does not eat pork but would love to try a meat ravioli like this? Substitutions?
Thank you 🙂
Marisa Franca
Hi!! A good substitution would be chicken or turkey sausage. You could even use venison. Just follow the rest of the directions. After the meat is cooked, we like pulsing it one or twice in the food processor to make sure there aren't any big chunks. Let us know how it goes! xoxo
Rebekah
Forgot to rate on previous comment!
Marisa Franca
❤️❤️❤️
Rebekah
My husband & I made ravioli from scratch for the first time yesterday using this filling recipe & our Kitchenaid. We served these with a brown butter tomato sauce drizzled on top & garnished with shaved parmesan & chopped parsley. We all loved it! There was 5 of us & we used around half of the filling recipe. We mostly followed the filling recipe as is other than adding freshly minced garlic & some red pepper flakes. Thank you for a such great tasting recipe!!! We really enjoyed it & looking forward to using the other half of the filling & freezing for later.
Marisa Franca
Thank you, Rebekah, for commenting. I'm so glad you enjoyed the recipe. xoxo
Shelby
Fantastic recipe. I made this tonight and tossed in a spinach mushroom cream sauce.
Marisa Franca
HI, Shelby! So glad you enjoyed it -- thank you for taking the time to comment. xoxo
Lija
so excited to try this recipe, were gluten free and i have nooo problem making pasta and one thing ive been so wanting to make for my boys is ravioli. Its exactly the same recipe i use for my pasta dough, ty!
Marisa Franca
Hi, Lija! I'm excited for you. Let me know how it turns out. Happy ravioli making! xoxo
Sharon
We made this the other day. The filling is fantastic and I would definitely use it again. We had a few issues with the dough. We didn’t knead the dough enough (the recipe doesn’t talk about kneading) and I believe you need to get it thinner, up to number 8 on the machine not 6. It was too thick so when cooking for 4 minutes it wasn’t very tender. We froze the left overs so will cook those longer and see it it makes a difference. This is only our second time doing ravioli (first time the dough recipe seemed better) so I didn’t realize those two steps would make such a difference.
Marisa Franca
Hello Sharon! I'm glad you like the filling - it is one of our favorites. As far as the pasta dough goes, we use the processor to knead our dough - we've never had any problems. If you're doing it manually, I do believe I mentioned kneading it for two minutes, that may have not been enough. You have to see that the dough is smooth. There are so many variables when it comes to pasta machines. Our 6 is just right for us but you certainly can go thinner. Using our ravioli maker if we go too thin the filling might tear the pasta. It's all up to you. We've had to make adjustments because our eggs were too large for the pasta recipe. 🤣 Let me know how it goes when you do it again. xoxo
Ashley Judd
I love wontons! Thank you for the recipes! Would you have one for the (chewy crunchy)wonton noodles that are often served in the restaurants , or sold in the supermarket under the same name? Thank you !
Jess
Any tips for someone who doesn't have a food processor when making the filling?
Marisa Franca
Hello, Jess! Just make sure your meat is chopped fine. Brown the hamburger and once it's cooled chop it fine with a knife. You know, sometimes when you brown hamburger it clumps in bigger pieces. When you get the clumps out it's easier to combine with the other ingredients and makes a really nice filling. Let us know how it goes.
Cindy
I have some 00 flour. Should I use that and would the measurement be the same? Thank you! Looking forward to making these.
Marisa Franca
Hi, Cindy! Yes, you can use the 00 flour, in fact it's preferred. The dough will seem a little dry at first but once you work it and let it rest it will be perfect. Let me know how it goes. xoxo
Carol Palombo
First, let me say, meat ravioli would be my last choice of raviolis out there...however, we are in the middle of a pandemic and stuck at home. I had 'meatloaf' blend instead of ground beef as that's all my local store had available to deliver last week. Sure, I could make a meatloaf, meatballs...but, I had time...lots and lots and lots (and lots more) of time, so I thought, 'why not?' WELL! I am a convert...this recipe is absolutely fabulous!! I did make a couple alterations (I didn't have country style pork sausage)...I did have a bratwurst so used that. I also didn't have Ricotta...I used cottage cheese instead. I added a tad of basil/italian spices, a hefty shake of red pepper flakes and ground away. Oh my...drool-worthy. Oh, and that thing about having lots of time? Yeah, well, this recipe actually doesn't need that much time! Even considering the home made pasta...so go for it, you won't be sorry!
Marisa Franca
Carol, I love your style!! That's what great cooks do -- make do and make the best of it. I'm sorry to hear you're stuck at home but you're making the best of it. Are you making bread yet? That will keep you busy for a while. In the meantime it looks like you'll be making some very creative recipes. Un abbraccio forte (sending a big virtual hug!)
Jim
Best I ever had
Marisa Franca
Thank you, Jim! So glad you enjoyed them.
Lucie
I'm confused about the pasta dough... The recipe calls for 14 oz of flour (3 1/8 cups) On my measuring cup, 2 cups equals 16 oz, 3 1/8 cups would be a little over 24 oz, just wondering which one it is...
Anon
14 oz in this case is a weight measurement, not a volume measurement... 3 1/8 cup by volume or 14 oz by weight... It can be confusing because oz can refer to volume or weight
Marisa Franca
That is true, it can be confusing but since we're talking about "flour" that is a dry measurement it would be by weight.
Marisa Franca
Hi, Lucie! Are you using a scale to measure the amounts? The right amount is 14 oz. of flour or 3 1/8 cups. We like using a scale because it is more accurate. For instance, 14 oz. of white sugar would measure 2 cups. If you do a lot of baking a scale is really helpful.
Jeannie
I LOVE this recipe! I've made it twice - second time tells me I'm doing it right! Fantastic recipe!
Marisa Franca
Thank you for the sweet comment, Jeannie!I'm so glad you like it!!Let me know what other type of ravioli you're making. xoxo
Autumn Cruz
How did you fry the ravioli? What kind of oil did you use? Can I do it in a deep pan? How long do they stay in the oil and what temperature? Thanks 🙂
Marisa Franca
Hi, Autumn! Fried ravioli are soooo good. I plan on posting the recipe and pictures in the near future. But I'll write out the basics here. You'll need fresh ravioli or frozen that are thawed. We like to use peanut oil but you may use vegetable. You'll need the oil at least two inches. You will also need panko crumbs (what we like to use because they are super crunchy) or Italian bread crumbs. When I post I'll be able to tell you how to make Italian flavored bread crumbs from panko. Now, first dip the ravioli in buttermilk then in the panko crumbs. The oil should reach 325 F. Turn the ravioli occasionally as they fry, about 3 minutes. Use a slotted spoon to transfer the ravioli to paper towels to drain. Sprinkle with Parmesan and serve with a bowl of your favorite marinara sauce. Let me know how it goes. xoxo
Josh
The recipe says that it serves about 15. I also read in other comments that the recipe makes 90 to 100 ravioli. So does that mean that a serving size to reflect the nutrition information shown is about 6 ravioli per guest?
Marisa Franca
Hi, Josh! Yes, you are correct. I figured around 6 ravioli per person although I would probably only eat 4 and there are several male members in the family that could eat 10+. I just tried to get an average number.
Allison
What could I use instead of ricotta? My family does not like ricotta at all but I’d love to make homemade ravioli! We haven’t had it in years because we don’t like store bought ravioli.
Marisa Franca
Hi, Allison! There are several substitutes you can use, here are some of them: goat cheese, cream cheese, cottage cheese drained and blended, pot cheese, fromage blanc, and mascarpone. I've heard of some people using tofu also. Good luck and let us know how it goes.
Ashley
Do you have a recipe with no meat just cheese for the filling? Double recipe is okay.
Marisa Franca
Hi, Ashely. We do. Here is one:https://allourway.com/triple-mushroom-ravioli-with-cheese-ravioli/. And we do have one with just ricotta and spinach filling but not posted. I will have to post for those who don't want meat. The mushroom is really good. Thank you for your interest. xoxo
Jerry
No way will frozen ravioli cook in 5 minutes. They will take at least 20 minutes.
Marisa Franca
Hi, Jerry! That is how long our frozen fresh pasta ravioli take. The larger ravioli may take a minute or two more. Then we add the ravioli to a sauce and it cooks a bit more. I'm afraid that if you cooked fresh pasta ravioli for 20 minutes you'd have ravioli that weren't edible.
Dolly Kudla
I am having trouble getting the ravioli out of the base any suggestions is it alright to pilot?
Marisa Franca
Hi, Dolly! Make sure that you have floured the dough and the form. I know sometimes too much flour can make it difficult to seal the top dough to the bottom. What you can do is lightly spritz some water on the bottom dough before you put on the top. Then use the rolling pin. And sometimes I do have to coax those little pillows out of the form. They eventually come out. Let me kow how it goes.
Rae
How long do frozen ravioli keep? Also, if i wanted to add spinach to the dough, how would you recommend I do this? Great recipe, thanks!
Marisa Franca
Hi, Rae! If you put them in an air-tight bag and then in a freezer container they will last for one to two months. Ideally a vacuum sealer works great - our son has one and the ravioli would last even longer. What is most important is that you get as much air out of the bag and container as possible. If you want to make a spinach pasta- thaw out a 10- ounce package of frozen spinach. Squeeze as much water out of it as you can, that's super important. In a food processor combine the spinach, 5 eggs, and puree until the mixture is dark green and smooth. In a bowl whisk 4 cups of all--purpose flour with 1 teaspoon salt. Pour the flour on a bread board, countertop, or silicone pastry mat. Make a well in the middle of the flour. Pour the spinach-egg mixture in the middle and using a fork start working in the flour. When you can, start kneading it adding more flour. When the dough is smooth and slightly tacky but not sticky. Set aside, covered with plastic wrap. About 20 minutes, to let the gluten relax. Then make your pasta in whatever form you want.
Lindsay
The last sentence: "You'll buy ready made again!"
hahahah you should fix that....
Marisa Franca
Thank you, Lindsay!! I will definitely change that!! Have you ever though of being a copy editor? My Hubby who reads what I write was supposed to catch that!!
Dixie
I read , you'll never buy ready made again
Marisa Franca
Hi, Dixie! I corrected it! I reread what I write so many times it takes fresh eyes to capture mistakes ???? Hope you have a wonderful year!!
Catalina
Your ravioli look divine! I would like a huge bowl right now! It seems so easy to make them, but I know that you really need to have the right skills and equipment.
Catherine
Dear Marisa, your ravioli look absolutely delicious! I love the whole process of making pasta and it brings back so many wonderful memories. I wish I could try yours...they are wonderful! XO
Cheese Curd In Paradise
I have always been too nervous to try this at home, but I really appreciate the step by step recipe to make it feel less daunting! I am going to give it a try!
swathi
Marisa you make traditional recipes with great ease. I love this ravioli meat and cheese filling looks delicious. I don't have a ravioli cutter. I need to get one. Even without heavy sauce this sound delicious.
Claudia Lamascolo
Marisa, these are just perfection. I have to tell you I make every pasta by hand great except these. No matter whether I use a fork or machine they open and I lose my filling. Its so frustrating. I need to do this again using the tools you have and this recipe, Maybe all this time it was just my dough! Thanks for posting merry christmas sweet friend!
Emily Strickland
I love this recipe! I have used this filing with another pasta recipe, but this time I used this pasta recipe. I will never use another pasta recipe! It's so simple to make! I use an Atlas pasta roller, and roll dough to a 6 or 7. I made 3 batches and have vacuum sealed them and frozen them in preparation for surgery. The only thing that will need to be done is cooking them! I do suggest buying a set of really cheap set of toddler flatware. The spoons are wide and flat. It's perfect if you use 2. Scoop a level spoon full and use a second spoon to form a disc of filing, then place in your form. It is the perfect size of filing for the pocket, and faster than any other method I have used! Thanks for the amazing recipe!
Mo
I love homemade Italian. Have never made a meat filled ravioli but can tell just by looking at your ingredients that this is 5 star all the way. Can’t wait to try it.
Quick question. You mentioned going to a thickness of 5 on the pasta. I have a different pasta roller. Atlas machine with 10 settings (0-9). Would I still roll it to 5 or should I go a little thinner? Thank you!
Marisa Franca
I'm not familiar with your hand roller. I'd try it at the 5 and see if that's thin enough. If not go up a notch until you get the right thickness. No matter what thickness, homemade pasta is GOOD!! ????
Karyl Henry
I made spinach ravioli for the first time a few months ago, and I'm hooked. I haven't done a meat one yet, but that is next on my list. Thank you for these detailed and very helpful steps!
Michael Guerin
Hello Marissa, My father loved gadgets and had bought a ravioli mold back when I was in high school, sadly he never got to use it. I recently found it, still in the factory packaging. Have purchased a Masrcato Atlas 150 pasta roller, so should be good to go. was looking for a ravioli recipe, when I found this. Something very similar to your recipe will be the first ravolie made in my father's mold. Thank you!
Mike G.
Marisa Franca
Hi, Michael! I'm so glad you found the ravioli maker. We love making ravioli-- it's really a lot of fun. Put your favorite music on and give it a go. The pasta recipe is easy to make and it NEVER fails. The fillings we have are easy and so tasty. I can't wait to hear how your ravioli adventure goes!! Just think of all the filling possibilities out there!! Boggles the mind. Let us know how it goes. And if you have any questions at all - just ask and I'll get back to you ASAP!!
Clearissa Coward
Oh Marisa, this dish looks scrumptious. I am so glad to feel the cooler temps and get to prepare the comfort foods of the season. This dish is certainly comforting. I have never tried making my own ravioli but you have a way of making it look easy. Loving this recipe and thank you for sharing with #TheBloggingGrandmothersLinkParty.
Carole
I've tried many recipes and this is by far the best. Instructions were very easy to follow
Thank you so much for taking the time to post this recipe.
Marisa Franca
Hello, Carole! We're so glad you wrote and let us know. We make so many ravioli throughout the year at times we feel like a factory.???? We love sharing our recipes and experiences. Have a wonderful weekend.
Dave
Is the breakfast sausage seasoned?
Marisa Franca
Yes, it is Dave. We used Country sausage for this. We have used hot Italian sausage too.
Grammy Dee | Grammy's Grid
I've never tried to make it but your directions make it seem like maybe I could do it. I like that you can freeze for later. Thank you Marisa for linking up at the #BloggingGrandmothersLinkParty 26! I shared your post x 4 ♥
Marisa Franca
You're welcome, Dee! Your link party always gives me such inspiration.
annie@ciaochowbambina
This is a great tutorial! Thank you! Nothing like homemade ravioli! These look divine, my friend!
Elaine @ Dishes Delish
I used to love making ravioli with my mother!! Your recipe is very similar to my mom's. I haven't made ravioli in years but your recipe and beautiful photos have made me want to start again!!
Marlee
I love making ravioli so much! You can get so creative with the fillings!
Marisa Franca
Hi, Marlee. We are always trying to think of new fillings. It's fun getting creative.
Karen (Back Road Journal)
The filling sounds delicious and the ravioli look wonderful. Terrific tutorial.
Marisa Franca
Thank you, Karen. I hope you give the ravioli a try.
Frank
An excellent tutorial, Marisa Franca. And the filling sounds delicious.
Marisa Franca
Grazie, Frank. Making different fillings are a lot of fun. Ti auguro una Buona Pasqua.
Veena Azmanov
Marisa this looks insanely good. I can't wait to try it. It's been a long time (and I mean long time) since I made ravioli. I often make pasta but keep it simple. This is on my wish list.
Marisa Franca
Thank you, Veena. They really are easy to make -- especially with the ravioli form.
Denise
I wanted to see if your recipe was close to my mother in laws and it is! She's 100% Italian and she used to make them for us all the time. Now she has Alzheimers so those days are over. I keep saying I'm going to learn how to do it. So glad I can book mark and pin your post for when I do. They look delicious!!!!
Marisa Franca
Thank you, Denise. It's so sad to hear about her Alzheimers -- our loved ones are robbed from us while they are still here. I hope you do give the ravioli a try. xoxo
Helen @ Fuss Free Flavours
I love homemade pasta which is so easy to make with the pasta attachment for a stand mixer. I must get a ravioli mould and take it up a notch.
Marisa Franca
Hello, Helen. You'll love making them. The mold is not expensive and you can whip up a batch in no time.
Michelle
Whenever I make pasta, I always make a double batch at least. Once you get in the rhythm. And this one? Oh it looks so good! I want it now.
Marisa Franca
You're right, Michelle. That's why we always make a double batch. You've got all of the equipment out plus the ingredients. Might as well make more and freeze some. Have a great day!
Gloria
Homemade pasta may seem like work, but I find it so rewarding. The taste is fantastic...and I know your recipe would be so delicious. I love your little ravioli maker...I need to get one of those. The pasta attachment is so much fun. This looks like a great "rainy weekend" project. I just might make a huge batch an put some in the freezer too.
Marisa Franca
Great rainy day weekend project or how about a snowy day project?? I bet you could come up with lots of great flavors, Gloria. xoxo
Katie Crenshaw | A Fork's Tale
Making homemade ravioli looks so fun. Now I want to make it. The filling in this looks amazing.
Marisa Franca
Thank you, Katie! Ravioli are fun to make but even better to eat.
Julie
These look just beautiful -- they look exactly like the ravioli rolled by the "pasta mamas" at our Italian market! I love making homemade pasta but I haven't tried tackling ravioli yet. I can't wait to give this a try!
Marisa Franca
Thank you, Julie! You'll love making your own ravioli.
Eileen Kelly
This is the best pasta tutorial to make ravioli ever! I have to tell you that I have made ravioli, using wonton wrappers, #nojudging. I have been wanting to make homemade raviolis because the store made never compare to the homemade raviolis. I now feel pretty confident, as long as I have this out in front of me. This will be a project I am looking forward to this week!
Marisa Franca
Hello, Eileen! Thank you, that's very sweet of you to say. I hope you give them a try -- you'll never want to use the wrappers again.
Sues
This is such a great tutorial! And I am ALL about the idea of making extra and freezing, so I can have a wonderful dinner whenever the craving hits!
Marisa Franca
Hi, Sues! We get a craving several times a month and it's good knowing we have some stashed away.
Sara
Oh my yum! I can't wait to try your recipe! These ravioli look awesome!
Marisa Franca
Thank you, Sara! I do hope you give them a try.
Christine
Love this! Looks so delicious and perfect for dinner. Great tip to make extra for the freezer!
Marisa Franca
Thank you, Christine! It's always nice to have some in the freezer.
Paige
Wow these look perfect! I think the step by step guide is awesome, and actually it doesn't look that tough to make! Delicious too!
Marisa Franca
Hi, Paige! They really aren't difficult at all. I hope you give them a try.
Cindy
OMG I have a Kitchen Aid stand mixer and never thought about using it for ravioli! Do you have any tips for preventing them from exploding while boiling? I've had that problem with both fresh and store bought. Thx
Marisa Franca
Hi, Cindy! The Kitchen Aid is great for getting that dough nice and thin. Now, if your ravioli are bursting, make sure your water isn't BOILING just simmering. Slip them gently into the water. If you are doing them from scratch brush a bit of water around the edges so the two sheets of pasta seal when you press down on them. Sometimes if you have too much flour on them it will prevent a good seal. A bit of water brushed on them should take care of it. Hope you give it a go.
Emily Strickland
I use a spray water bottle. One quick spritz before adding the top layer of pasta, and they seal perfectly every time!
Rachel
I love, love, love homemade pasta but find making my own ravioli a little intimidating. You how-to instructions with photos are super helpful! Thanks!
Marisa Franca
Hi, Rachel! They really are very easy to make. I hope you try it out.
Jenni LeBaron
These are beautiful and they look so flavorful! I would love this dish!
Marisa Franca
Thank you, Jenni! They are really good. xoxo
Tanya
Best instructions on how to make ravioli ever!!! Ravioli seems so intimidating but your instructions make it so easy. Can’t wait to try this recipe!
Marisa Franca
Thank you, Tanya! I hope you give it a try. ????
Marisa Franca
Thank you for the tip, Connie!! Very clever and useful to know. Have a great weekend.
Christie Hawkes
These ravioli look delicious! I must admit, though, I still feel a little intimidated by the process. Can I come to your house for dinner? 🙂 Thanks for sharing on #BloggingGrandmothersLinkParty!
Marisa Franca
Hi, Christie! You're always welcome!!
Carol Borchardt
These look sooo good and so perfect! I haven't made pasta is several years but this recipe is inspiring me!
Marisa Franca
Hope you give it a try, Carol. Have a great weekend.
Christine
I've never made homemade ravioli before, but it looks DELICIOUS! Such a great idea for hosting a dinner party or having friends over. My family would also love this!
Marisa Franca
The beauty of knowing how to make ravioli is that you can add your favorite filling! Christine, once you make it you'll wonder what's been taking you so long. xoxo
Karyl | Karyl's Kulinary Krusade
I haven't made fresh pasta in ages...but it's SO delicious!! Nothing compares to homemade. I need to get a ravioli press because it would be so fun to make all kinds of different types. You have inspired me!
Marisa Franca
Hi, Karyl! The ravioli press is not expensive!! We've made hundreds of ravioli and we are still planning on making many more. Have a great day!! xoxo
Monica | Nourish & Fete
I really want to get back to making some homemade pasta - this reminds me of how much fun it is and how lovely to be able to pick your own fillings! Lovely post.
Marisa Franca
Thank you, Monica! I'm looking forward to finding more fillings and even flavored pasta! ????
Kimberly @ Berly's Kitchen
Yum! This ravioli looks amazing! We've never made homemade ravioli but have always wanted to. Thanks for providing step-by-step photos. We need to give it a try.
Marisa Franca
Hi, Kimberly. Hope you give it a try -- it's not hard at all.
Donna
I used to make my own ravioli all the time before kids, now it just seems like too much. I love the idea of making extra and freezing it though, this would be a great Sunday 'project' to get the whole family involved and then have extras on hand for when the craving hits!
Marisa Franca
That's what Hubby and I do, Donna. We make lots -- just as easy to make more when you have all the equipment out. xoxo
dixya @food, pleasure, and health
i have never made ravioli at home...this sounds like a good project for the weekend.
Marisa Franca
It's lots of fun, Dixya. We put on some music and just mass produce.
prasanna hede
Lovely ravioli recipe. I liked that you shared all steps by step pictures.lovely share.
Marisa Franca
Thank you, Prasanna! I hope you'll have the chance to try to make them. So very rewarding! xoxo
Anne Murphy
Right before I went gluten free I got a ravioli plaque - I'd been looking for one for years! So it's been sitting, waiting for me to get my skills up to trying gluten free pasta...
So now this is a bit of a push from the universe! LOL That filling looks wonderful, and I like your demonstation of how to use the thing (though I know there will be some differences with the dough - that's a given.)
Ashima
I've been wanting to make veg ravioli since ever but never got around it.. this sounds fun.. I have to try it sometime. And such a nice gift 🙂 Congratulations!
lots of love,
ashima
Marisa Franca
Ravioli is a lot of fun, Ashima. I hope you get the form -- makes it easy!! xoxo
Marisa Franca
Hello, Ashima! Our kids love to give us kitchen gifts -- they get some of the bounty!! They know we love to cook. Hope you do have a chance to try it out. xoxo
Veena Azmanov
I love making ravioli at home and this sounds so delish. I need to get me one of those ravioli pans. I make mine just simple cute into squares. These looks so pretty and perfectly cut. The filling sounds so perfect!!
Marisa Franca
If you get the ravioli pans, Veena, you'll be hooked and making all sorts of ravioli. I bought a larger size of maker and I haven't used it yet. Can't wait to try it -- I see seafood in its future. ????
William Stewart
How many does your recipe make, Marisa?
Marisa Franca
Hello, William! I'm so sorry we didn't include the amounts. Usually, we get anywhere from 90 to 100. One full cookie tray will hold 40 and we normally get 2+ trays. We normally make a double batch of pasta dough. I believe the pasta recipe on that post is for a double batch. Buon appetito!
Joe OLeary
Marisa, how many ravis does the filling recipe fill? We use a 10 ravioli mold which is about equal to the 12 small ravi mold shown in the pics.
We have both the KA attachment and a manual Marcato 180mm machine. We use the Marcato for ravioli because it makes a nice wide strip that overhangs the mold.
Marisa Franca
Hi Joe! Since our machine went kerplunk we weren't able to do an accurate count. Our ravioli form does 12 and we had 5 dozen. We had at least half the filling left so I know we could easily had made anywhere from 5 to 6 more dozen. With your larger form I'd say easily 8 to 10 dozen depending how much you fill them. We will be getting the larger form 🙂 I have some filling I want to try with a larger ravioli. If you do your 10 ravioli, let me know how many you got. Have a great Memorial Day Weekend.
Mary
I've never tried making ravioli, but they would taste so much better than the store-bought ones, I'm sure. The ravioli maker would pay for itself pretty soon, too. I'm sure my girls would enjoy making up a batch of these (maybe with a meatless filling). I gave away my pasta maker years ago when we moved, but maybe I'll put that on my birthday wishlist 🙂
Marisa Franca
Hi Mary! Until we started making them ourselves we kinda thought the same thing -- too much trouble -- but they really aren't. We also have a recipe for a mushroom cheese filling that is simply delicious!! Here's hoping you get your birthday wish 🙂
Amber @ Slim Pickin's Kitchen
I've always wanted to make homemade ravioli the traditional way! This looks like a fantastic recipe, and I'm totally adding a ravioli maker to my Amazon Wish List!!!
Marisa Franca
Hi Amber! We've had so much fun making the ravioli. We're like an assembly line. We'll make more than 100, freeze them on a cookie sheet then put them in a container with a plastic liner. It is great having ravioli any time we want. Let me know how you like making them once your "wish" comes true.
Jenny
I see an Amazon shopping spree in my future. I have the same kitchen aid mixer but haven't bought any attachments yet and I want to get the pasta attachment so bad now! Thank you for the inspiration and I will let you know how your recipe turns out after my new toys are delivered. 😉
Marisa Franca
Hi Jenny!! Oh my we love all of our attachments. Our kids even bought the one that makes the rigatoni -- that tutorial will be coming up to. And we use our meat grinder. Let me know how everything turns out!
Tania @ COOKTORIA
These ravioli look so tasty! And your step-by-step photos sure make it easy to follow the recipe. Thanks for sharing!
Marisa Franca
You're welcome! The ravioli are delicious. We've even fried them as an appetizer.
Liz@Virtually Homemade
These ravioli looks so delicious Marissa! I love frying and baking ravioli too.
Marisa Franca
We'll have to try just baking them -- those little pasta filled dumplings are so versatile. I've never tried making a sweet filling but I may just have to try it -- my mom made a jelly filled gnocchi.
Diane P.
This must be deja vu. I was thinking a few days ago about ravioli making. When my mom was alive, we made gnocchi and ravioli often. Since she passed away, I have made gnocchi numerous times, but never ravioli (she died in 1990!). I guess it's about time to get the ravioli maker out, and dust it off!!
Marisa Franca
Some of the best times are spent working together -- my mom used to make her potato gnocchi and then she would take some of them and make the gnocchi into a U-shape and she fried them. We called them "storti" which meant crooked. We have several fillings for our ravioli and we'll be making more of them.