


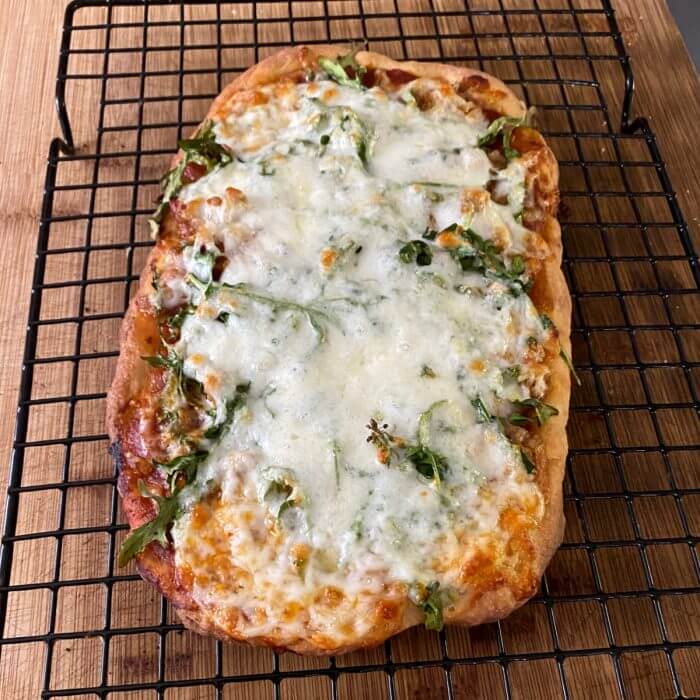
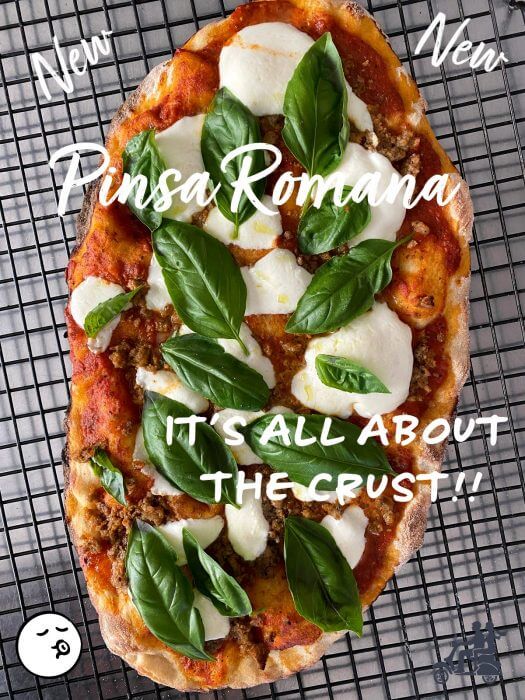
There's pizza and then there's Pinsa Romana. It's all about the dough! The dough is full of flavor and the texture is light yet chewy. This culinary creation is a real game changer born from a traditional recipe for Roman-style pizza unlike our Perfect Pizza Crust based on the Neapolitan-style pizza. You can grill or oven bake this delicious dish and finish it with your favorite toppings. We even include a no-gluten variation.
Jump to:
Viva la differenza
So, what is the difference between pinsa and pizza?
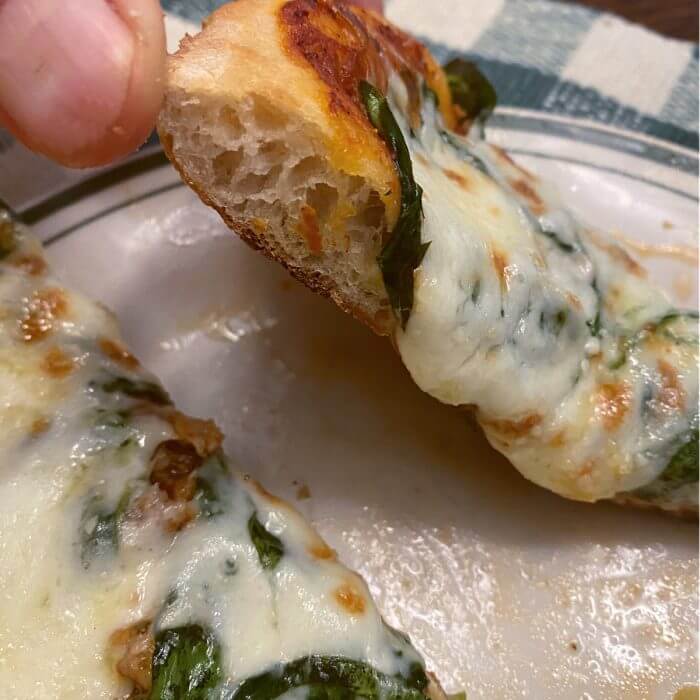
First, there's the distinctive shape - it's oval rather than round. But it's just not the visual difference that makes this product outstanding, there's also the digestibility factor.
Pinsa vs. Pizza
How much better is it for you? Pinsa's nutritional differences:
- 48% less sugar
- 85% less fat
- 100% less cholesterol
- 33% less KCal
- 75% hydration whereas traditional pizza has 50-60%.
- Presence of rice and soy flour means less gluten than the average pizza dough making it extremely digestible
Pinsa is convenient
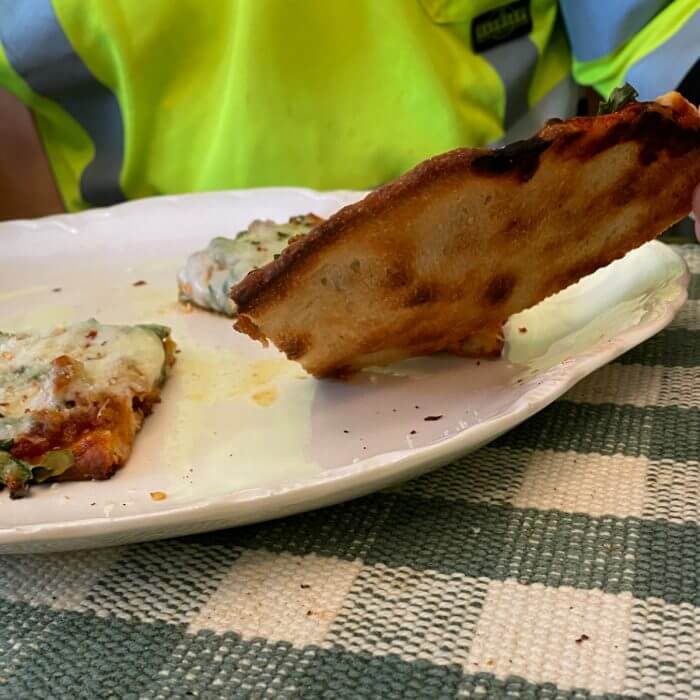
You can make the base ahead of time. When you're ready to eat, simply add toppings to it. Yes. It's that simple. It only takes a matter of minutes. How great is that?
We've even had luck preparing the dough and freezing it before the first bake. The Pinsa Romana turned out perfectly. It was crisp on the outside and soft on the inside, exactly like we wanted.
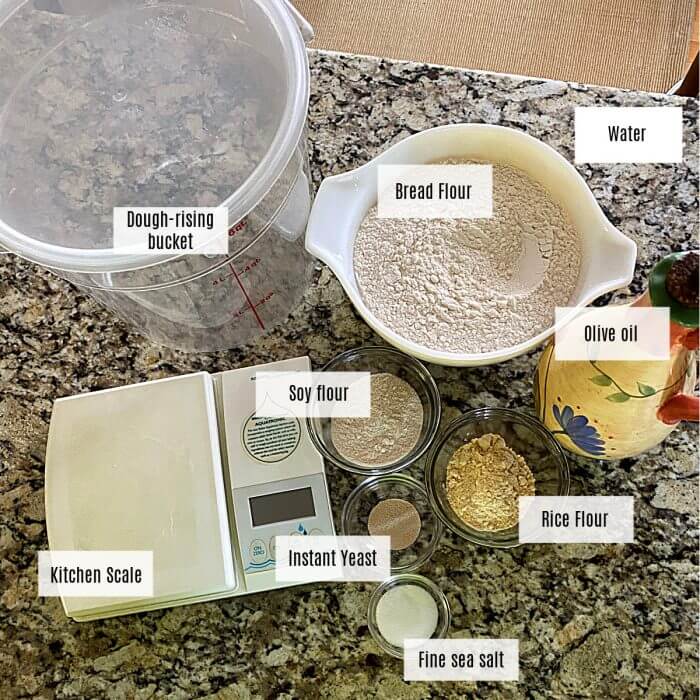
Pinsa dough ingredients
The ingredients are simple as well as the procedure. No fancy twirling of the pinsa Romana dough like pizza. You just stretch it with your fingers.
- bread flour -- we use King Arthur, which we believe is a high quality wheat which absorbs more water.
- white rice flour -- gives the pinsa base a soft and crunchy texture.
- soy flour -- replaces all animal fats and is gluten-free and replaces some of the regular flour.
- instant yeast -- helps metabolize the starches and sugars in the flour, here is where you get the rise in the dough. (You can also use active dry yeast)
- filtered water - you want as pure of water as possible for taste and for the chemical action in the dough.
- fine sea salt -- slowing yeast fermentation rate, strengthening the dough, enhancing the flavor of the final product. We use the fine sea salt because it mixes better.
- olive oil -- it works to tenderize by coating some of the proteins that form gluten.
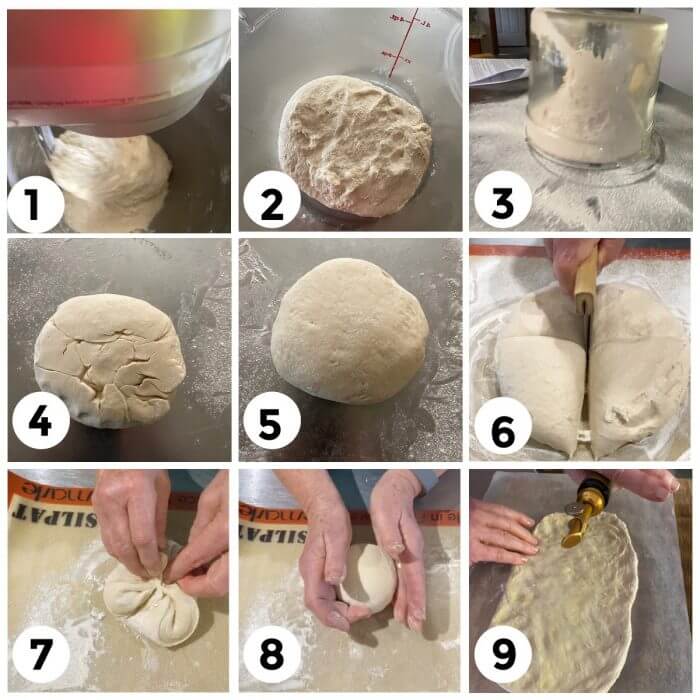
Pinsa making
All the preparation steps for making this dough is different from traditional Pizza making.
- Creation of dough -- the flour mix has 3 flours plus high hydration.
- Forming of balls -- they aren't just rolled but the ends are brought together then pinched.
- Stretching -- using the fingertips the dough is shaped into a long oval.
- Baking -- the oval is twice baked. First you set the dough and then you put the toppings on the light crispy dough.
These steps basically changed and improved the Roman pizza. Today there are more than 5,000 Pinserias worldwide and they all strictly follow the dough making process.
Topping inspirations
Here you are only limited by your imagination. The toppings for pinse are endless.
- Diavola -- Tomato Sauce, Mozzarella, Bell Pepper, Spicy Salame, Black Olive, Red Onions, Fresh Basil, Pepper.
- Margherita -- Tomato Sauce , Mozzarella, Basil and Extra Virgin Olive Oil.
- Parmigiana -- Tomato Sauce, Mozzarella, Eggplant, Grana padano cheese and Basil.
- Napoli -- Tomato sauce, Mozzarella, Anchovies and Oregano.
- Cotto & Funghi Pinsa -- Tomato sauce, Mozzarella, Prosciutto Cotto, Mushroom and Parsley.
- Marinara -- Tomato Sauce, Garlic Oregano.
- Dolce & Salato (sweet and salty) -- Mozzarella, Pears, Gorgonzola Cheese, Honey and walnuts.
- Montanara (named for the mountains around Naples) -- Mozzarella, Pecorino, Guanciale, Mushroom, Truffle oil, Black pepper and parsley.
- Quattro Formaggi -- Mozzarella, White cheddar, Gorgonzola cheese, Grana padano, n' duja and parsley.
- Tropea (seaside resort in Calabria region)-- Mozzarella, Anchovies, Zucchini, Red onion, Cherry Tomato, Caper and Extra Virgin Olive oil.
- Cotto & Melanzane -- Mozzarella, Grana padano, Prosciutto Cotto, Eggplant, and Red Onion.
- Salame -- Mozzarella, Mozzarella Di bufala, Arugula, Salame, Artichokes and Parsley.
- Triple P -- Mozzarella, Potato, Pesto, Pancetta and Cherry tomatoes.
- Salmon Pinsa-- Cream cheese, Stracciatella, Arugula, Smoked salmon, Cherry Tomato and Balsamic Vinegar.
- Parma -- Stracciatella ( a cheese from the Puglia region) Prosciutto di Parma, Mozzarella di bufala and Cherry tomatoes.
- Mortazza (Roman term for mortadella)-- Stracciatella, Mortadella, Ricotta cheese and Pistacchio.
- Miele -- Ricotta cream, Nuts, Honey, Fichi (figs) or seasonal fruit.
Chef tips
- If you're unsure of your oven's accurate temperature, get an oven thermometer. We have a brand new dual fuel stove/oven and the oven would signal that it had reach our desired temperature. It hadn't. We ordered this thermometer and now whenever we bake we make sure that the temperature is accurate before we pop anything into the oven.
- When grilling the pinsa dough, make sure your toppings are at room temperature and you put the cheese on first. The pinsa is super hot to melt the cheese.
- Use rice flour for flouring the pinsa - it doesn't stick and the dough doesn't absorb it. This is also good for the gluten-free variation.
- Use parchment paper on the bottom of the pinsa, it makes lifting it with a peel or sliding it onto a cookie sheet easier.
- Substitute instant yeast for active dry yeast at 25%. For 1 teaspoon of active dry yeast use ¾ teaspoon instant yeast.
Quattro Chiacchiere (a chat)
When I first read about this "new" and "exciting" pizza I was a bit skeptical. I mean, after all, we LOVE our pizza. How can you improve on perfection?
Corrado Di Marco did.
In 2001 Di Marco invented this delightful dish at his pizzeria La Pratolina. He named his creation pinsa from the Latin "to beat or press," which refers to the shaping of the dough.
Besides changing the formula for the dough, he relies on a cold, slow rise. This results in a partial breakdown of the protein and starch in the dough, which promotes the wonderful texture and flavor.
We always make extra dough and freeze what we don't use. Just thaw it out and let it come to room temperature. Oh! So! Good!
Am I tempting you to try it? I hope so. Once you try Pinsa Romana, I guarantee you'll fall in love with the new Italian in town.
Tutti a tavolo è pronto!
Un caro saluto e alla prossima.
You may need...
As An Amazon Associate I earn from qualifying purchases.
We had a bit of a problem finding soy flour - but it could be the times. We ended up ordering this soy flour online. Ordering on line saves us from driving from store to store.
What's new? check out my All Our Way Store on Amazon. We'll be adding more items we love and use or wish we had to make cooking fun and easy.
Thank you for being part of All Our Way!
Pinsa Romana Dough Recipe
I'm not exaggerating when I say this dough is life changing -- at least my opinion of pizza and how it should be. Once you taste the pinsa you'll want to shout it from the roof tops exactly how delicious it is. Anyway, that's how I feel - that's why I'm so excited to share this recipe with you.
And if you're wanting to give your family a pizza dinner that's a bit different, you've got to try our Pizza Tater Tot Casserole. From picky eaters to adventurous foodies, this delightful creation is sure to put smiles on faces and fill tummies with joy.
Calling all pizza lovers who are looking for a culinary adventure. We have a three-cheese white pizza recipe that will make your taste buds do a happy dance. It's made with a drizzle of olive oil instead of heavy Alfredo sauce. You've got to try it to see how tasty it is.
If you like this recipe please give it a 5-star rating.
📖 Recipe

Pinsa Romana Dough Oven or Grill
Equipment Needed
- Oven
Ingredients
- 17-¾ oz bread flour (500 grams; about 3-¾ cups) I prefer using King Arthur; will need more for dusting.
- 1-¾ oz white rice flour 50 grams; ¼ cup plus 1Tbs. plus 1 tsp.
- 1 oz soy flour 30 grams; ⅓ cup plus 1 Tbs.
- ⅛ oz. active dry yeast (3-½ grams; ½ Tbs.or 1-½ tsp. )we used Instant yeast at 1-¼ tsp.
- 1-¾ cups water 400 grams cold filtered water (fridge temperature, 39℉ to 41℉
- ½ oz fine sea salt 14 grams; 1 Tbs. plus ½ tsp.
- ½ oz olive oil extra-virgin 10 grams; 1 Tbs. more for brushing onto the shaped dough for grilling and baking.
- Vegetable oil or nonstick cooking spray, as needed In a bowl of a stand mixer fi
Instructions
- In the bowl of a stand mixer fitted with the dough hook, whisk the bread, rice, and soy flours, and the yeast.
- Add 1-½ cups of the water, and knead on low speed until the dough comes together and there is no more dry flour in the bowl, about 3 minutes.
- Add the salt and olive oil, knead on medium speed. While kneading, add the remaining ¼ cup of water a little at a time.
- Once all the water has been absorbed, 2 to 3 minutes, increase he speed to medium high. Knead until the dough is smooth, elastic, and shiny, about 10 minutes more.
- Transfer dough to a large bowl lightly coated with vegetable oil. Cover tightly with plastic wrap, and let rise in the fridge (39℉ to 41℉) for 24 hours, or until the dough has tripled in size. (See notes below)
- Turn the dough out onto a lightly floured surface, allowing it to gently release from the bowl. Using a dough scraper or a knife, cut it into 6 equal pieces, weighing around 165 grams (5.8oz.) each. For this we use rice flour. It works better and the dough doesn't seem to absorb it as much.
- Working with one piece at a time, take the four corners and fold them into the center to attach. Do not flatten.
- The dough will tighten up and take on a round shape. Repeat with the remaining dough pieces.
- Place roughly shaped dough balls on a greased baking sheet. Leave enough space between the pieces so that they can double their size without touching. Sprinkle the dough lightly with rice flour, and cover the baking sheet lightly with plastic wrap.
- Set aside to rise at room temperature until the dough has doubled in size, 2 to 3 hours.
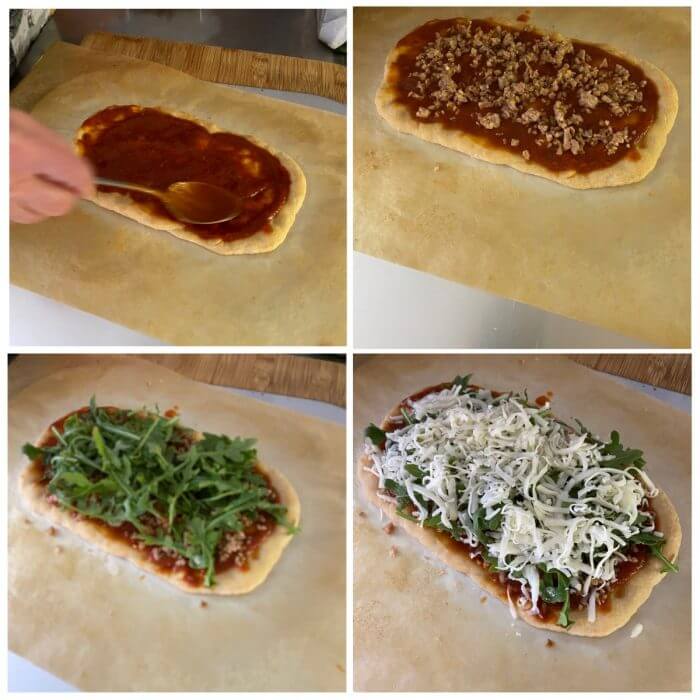
- While the dough is rising, prepare the pinsa toppings of your choice. Set aside.
- When ready to form the dough place one dough ball on a well-floured surface, then sprinkle more flour on top.
- Starting from the center and working toward the edges, work the dough into an oval by pressing your fingers flat into the dough, gently stretching and pulling, until it measures approximately 6 inches by 10 inches. If the dough is resistant, let it rest for a few minutes before trying again.
BAKED PINSA
- Position a rack in the center of the oven and put a baking stone or steel on the rack.
- At least 45 minutes before baking, heat the oven to 550℉.
- Brush one side of the dough with olive oil. Gently lift the dough with both hands and place on the pizza peel.
- Carefully transfer the dough onto the heated stone/steel. After 2 minutes, check that the dough is baking evenly. If not, spin it 180 degrees.
- Continue baking until golden-brown with a few dark spots, 2 to 4 minutes.
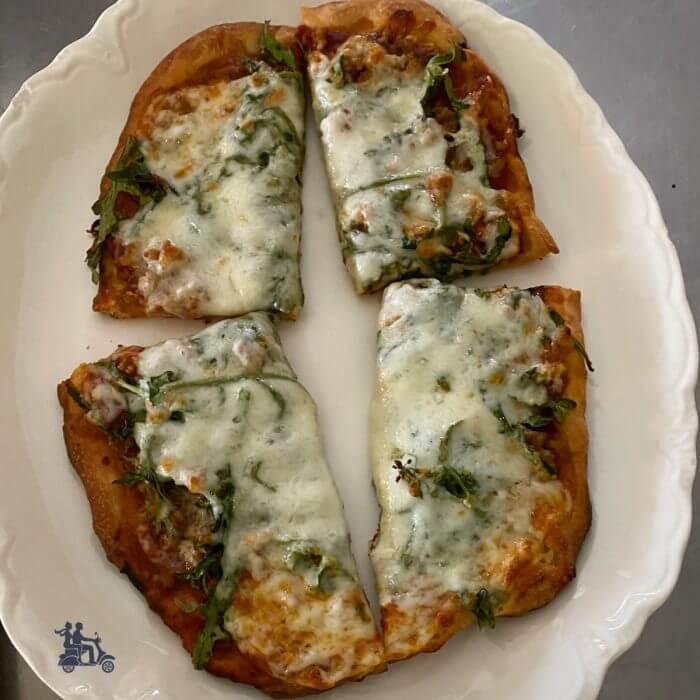
- Remove the dough from the oven and add toppings, then return to the oven and continue baking until the toppings are heated through and any cheese has melted, 2 to 3 minutes more.
GRILLED PINSA
- Well ahead of baking, heat the grill to 660℉.
- Brush one side of the stretched dough with olive oil.
- Gently lift the dough with both hands, fingers spread out flat underneath to prevent tearing. Shake off any excess flour.
- Position the dough, oiled side down, on the grill grate. Close the lid and bake for 30 seconds.
- Brush the unoiled side of the dough with olive oil. Using tongs, carefully flip the dough over. Close the lid and bake for another 30 seconds.
- Repeat the flipping every 20 to 30 seconds until both sides are golden-brown with some darker spots.
- Transfer to plate with the hottest side facing up (the one that was last facing down on the grill).
- Add the toppings and serve immediately.
- TIP
- Prepare all toppings before grilling the pinse, and have them at room temperature. Add any cheese first so that it melts on the hot dough.
VARIATION: GLUTEN-FREE PINSA
- Gluten-free pinsa doesn't work well on the grill but does work in the oven.
- Substitute an all-purpose gluten-free flour blend for the bread flour, such as Bob's Red Mill Gluten-Free Baking Flour, and prepare the dough as directed.
- Form the dough into six balls, each about 5 ½oz., and let rise until doubled in size, 2 to 3 hours.
- Put one piece of dough on a well-floured pizza peel, and generously flour the top and bottom of the dough ball.
- Using your fingers, gently flatten and press the dough into a 7-inch by 9-inch oval. Sprinkle with more flour if the dough begins to get sticky and shake the peel frequently to ensure that the dough isn't sticking.
- Lightly dab olive oil onto the top of the dough. Bake as directed above until puffy and golden in places, 5 to 6 minutes. 20
Notes
- If you're unsure of your oven's accurate temperature, get an oven thermometer. We have a brand new dual fuel stove/oven and the oven would signal that it had reach our desired temperature. It hadn't. We ordered this thermometer and now whenever we bake we make sure that the temperature is accurate before we pop anything into the oven.
- When grilling the dough, make sure your toppings are at room temperature and you put the cheese on first. The pinsa is super hot to melt the cheese.
- Use rice flour for flouring the pinsa - it doesn't stick and the dough doesn't absorb it. This is also good for the gluten-free variation.
- Use parchment paper on the bottom of the pinsa, it makes lifting it with a peel or sliding it onto a cookie sheet easier.
- Substitute instant yeast for active dry yeast at 25%. For 1 teaspoon of active dry yeast use ¾ teaspoon instant yeast.
Nutrition
Sign up for the emails and never miss another recipe!!
We'll never share your email or send you spam. PromiseNote: Recipes and content from © 2014-2020 All Our Way are copyright protected. Please do not use content or recipe without prior written permission. If you want to share the information, please link to this post. Grazie.


edgard
Is 400g of water right? That's only about 69% hydration. Thanks.
Marisa Franca
That is right - it's about 414.03g. If you think it needs more to work with, add a smidge more. (How do you like that technical term? LOL) Happy pizza eating. Let me know how you like it!
Barbara
Excellent dough followed the recipe and it was the best tasting pizza I have made. Looks like it was cooked in a pizza oven.
Marisa Franca
Hi Barbara!! Thank you so much for taking the time to comment -- I love hearing from fellow Pizza lovers. You made my day. Happy Pizza eating!! xoxo
Denise
We love this pinsa recipe! It's very good. I use pop up parchment sheets sprayed with pam olive oil & sprinkled w/ cornmeal to stretch each dough round on. I dip my finger tips in a dish of evoo to spread out the dough so no need to brush. I also dock the spread dough w/ my dough docker. Slide onto a pizza peel makes everything easy. I add 1/4 c sourdough starter to everything "bread like" that I bake. Definitely have to rotate 180 in my oven. Thank you for sharing this recipe : )
Marisa Franca
Ciao Denise! I'm so happy you like the pinsa recipe. We also use parchment paper and we do have a dough docker we use all the time with pizza. Wouldn't it be nice to have one of those fancy wood-burning pizza ovens?? Unfortunately our kitchen isn't that big and neither is our back yard. Happy baking!!
Justine
Hi Marisa,
This recipe looks great. I’m curious about the gluten free variation. Does it still need the same amount of kneading and ride time?
Marisa Franca
Hi Justine! I wish I could give you a definite answer. I've never made a gluten-free version so I'd hate to advise you on a particular time for kneading and rising. I just KNOW that it can be done. If you do make it gluten-free, please share with us your experience. xoxo
Paolo
Is there any substitute for the soy flour, none of my local stores carry it. Ty
Anthony
Marisa - would there be any benefit to using sourdough starter? Thanks!
Marisa Franca
Ciao Anthony! For this recipe I'm not sure since I've never done it. But you could experiment -- if you do let me know how it turns out. The original recipe is squisito (delicious). Happy baking!
Big
Hi do I need to keep the dough for 48 or 72 hours first ?
Marisa Franca
After you make the dough, you let it rise in the fridge for 24 hours. Then you form it into balls and let it rise until doubled in size -- about 2 to 3 hours. I hope that helps. If you have any other questions - I'll be happy to reply. Happy Pinsa Romana baking.
Carrie Robinson
I have never heard of pinsa before, but I am all for healthier pizza! This looks so delicious. 🙂
Misty Eilar
My kids love making pizza with me. I use no tomato and no diary, but they use the full recipe and love it. My 5 year old can do it almost fully by herself.
Jo
Pizza never fails be in in any style. This Roman style pizza is so delicious. Thank you for sharing the dough recipe, it looks sooo good!
Marwin Brown
This pizza looks incredibly tasty and filling, can't wait to try!
Jenny Graves
What a great variation on the classic pizza dough. Never thought of the combination of different flours. Can't wait to try it.
Jenny
That is a great variation on the classic pizza dough and it looks amazing. Never thought of combining bread flour with rice flour and soy. Can't wait to make it.
Sharon
Great pizza starts with great crust and this is one of the best! Add some great sauce and vegetables and you've got a new favorite way to eat pizza.
Debbie
Hello Pinsa where have you been my whole life?? I am not a fan a real doughy pizza crust so this sounds perfect for me. I can't wait to make this to throw on the grill, your pictures make it look so simple. Thanks for a lovely recipe!
Marisa Franca
Hi Debbie! This dough is so amazing. I just love the light airy dough -- any topping makes it spectacular. Buon appetito!
Paige
Homemade Pizzs is the absolute best and your version looks amazing! Photos are making me hungry!
Lori | The Kitchen Whisperer
I love pinsa dough as a variation on pizza. It's so light and airy with that distinctive crunch. This looks so good! Thank you so much for sharing!
Kathryn Donangelo
Homemade pizza is always a hit at my house! Thanks for the easy directions too, that made it super helpful!
Gloria
Homemade pizza is the best. This looks rustic and delicious. I know hubby would eat this everyday of the week if I let him.
Jovina Coughlin
This looks fantastic. Beautiful photo also.